With houses going on and off the market every day and sellers competing for the home buyer’s attention with photos, real estate photography has become a helpful and important tool. In an industry where a picture is worth a thousand words (and possibly several thousand bucks), it is of utmost importance to have captivating photographs.
Here are some helpful tips to keep in mind before, during or after the photo shoot for real estate photography-
Have a checklist
A rookie mistake by most people is not having a checklist when photographing their houses. Although houses differ, there are some common things to keep in mind. Wide-angle shots of each bedroom, the kitchen and the living room are preferred. Additionally, bathrooms, backyards or special amenities should have photographs too. Finally, a beautiful front-view shot is the cherry on the cake!
Have the gear ready
Fully-charged batteries, a tripod, wide-angle lenses and flashes are what you need for a well-exposed and well-composed photograph. Although smartphones are commonly used, using a DSLR camera and prepping your gear beforehand delivers the best results.
Setting up & Shooting
When shooting, it is best to keep the camera on a tripod at waist level rather than eye level. Lowering the camera helps you achieve a straight view of the verticals and the room with better compositions and angles.
Lights, Camera, Real-Estate
Turning on the lights makes the space feel warmer and more welcoming, adding more depth and color variance to the pictures. However, it introduces varying light temperatures which must be fixed later with editing. Thus, the decision to keep lights on or off depends on the rooms and existing lighting system.
Flash Shadows
Rather than pointing the flash directly at the scene, flashes must be aimed at the ceilings or walls to bounce light off and soften the effect. Flash shadows often occur behind ceiling fans or light fixtures and must be avoided.
Room Preparation
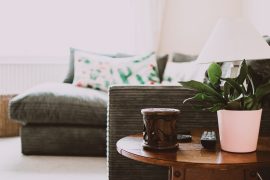
A little home staging and rearranging can make the photographs a lot more alluring to home buyers. One way to do this is to prominently feature a key element in that room- such as a fancy bookshelf, a grand chandelier or even the stairs. Key selling points such as the room’s spaciousness or natural lighting can also be highlighted. Another way to create a more inviting interior space is with the use of vivid flowers, vases or fruit bowls.
Creating Space
Clearing the floors of clutter not only makes rooms look more spacious, but it also makes them visually aesthetic. Shooting from corners and getting the other three walls in the shot can add more depth, making the room appear larger. For smaller rooms, shooting from the doorway can be a good idea. A lower or wider angle is also a great way to make home buyers perceive it as a larger room.
Correcting Distortion & Adjustments (optional)
To further enhance photographs to make them more appealing, various software can be used. Adobe Photoshop Lightroom and SLR Lounge Lightroom Preset System can help save time and create different styles. Lens Correction or Transform Module features can create photographs that look pristine and polished.
Correcting Colors & Light (optional)
While lowering highlights, brightening up shadows and increasing clarity are some of the conventional adjustments, experimenting with these is always fun. With various YouTube tutorials, don’t be afraid to create your own adjustment styles with a combinations of hues, saturation and other editing features!
Constructive Criticism
One of the best ways to improve your real estate photography skills is to learn from the best and get their feedback. Discovering things that only a more experienced eye can point out helps you learn how to take better pictures.
With these tips in mind, you can create wonderful photographs helping others find their wonderful dream homes!


